Introduction
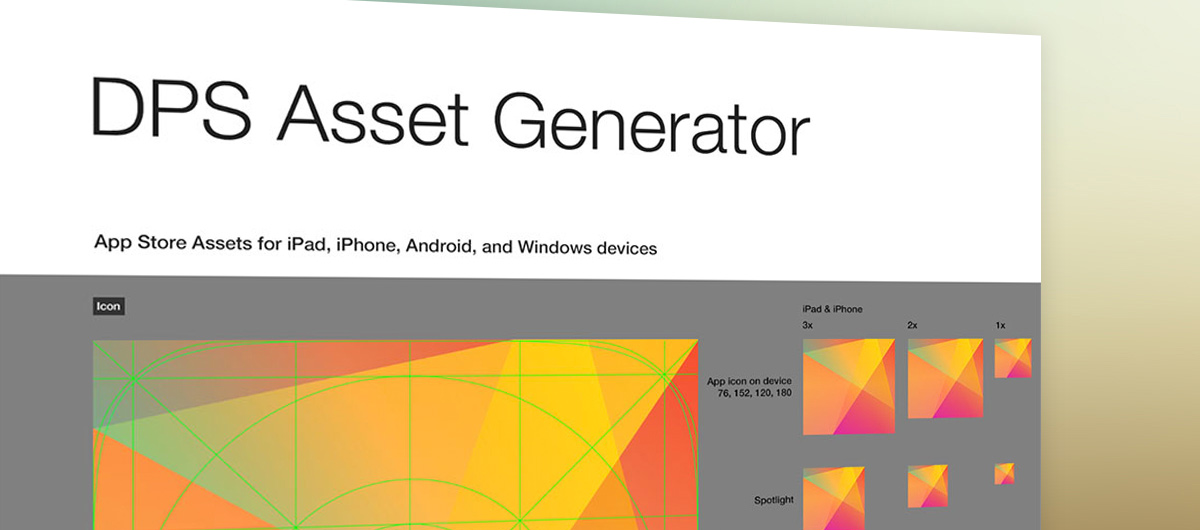
When building a DPS app, you need a variety of images used for app icons, launch screens, and custom navigation icons for iOS, Android, and Windows devices. Making all the graphics for iOS can be a complicated combination of sizes, whereas Android apps require only a single image, and Windows apps require three images. The DPS Asset Generator.psd file and the Generator feature in Adobe Photoshop CC help to coordinate and automate the production of nearly 30 files used when building apps for all three DPS platforms.
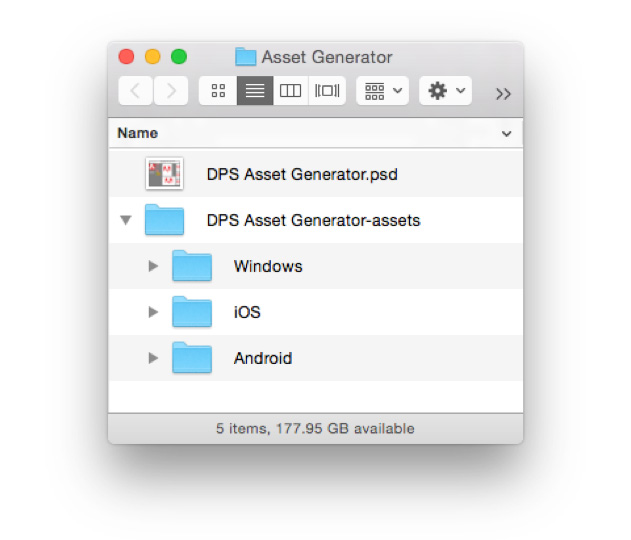
Adobe Photoshop CC introduced the Generator feature, which automates the creation of web graphics files based on layer names. The DPS Asset Generator.psd file takes advantage of Generator to create the image files when building DPS apps. Generator will create individual files and a folder structure, which organizes the files for the three platforms.
Setting Up the Asset Generator
- Move or copy the DPS Asset Generator.psd file to a known location, such as where you store required assets for DPS publishing.
- Open the DPS Asset Generator.psd file in Adobe Photoshop CC.
- To activate Generator, choose File > Generate > Image Assets in Photoshop CC.
If this option is selected, Photoshop will generate files based on layer and group names defined in the Layers panel. Photoshop will create a folder based on the file name, in this case called “DPS Asset Generator-assets” in the same location where the DPS_Asset_Generator.psd file is saved. The asset file type, qualities, dimensions, names, and folder structure are controlled by layer and layer group names in the Photoshop file.
The DPS Asset Generator will create image files for both Retina and non-Retina (1x, 2x, and 3x) iOS devices, Android, and Windows apps. Adobe Generator is available in Adobe Photoshop CC. Some layers in the file generate more than one graphics file, and files may be scaled. The generated files are organized into a folder structure with assets for each platform in separate folders.
Using the DPS Asset Generator.psd file
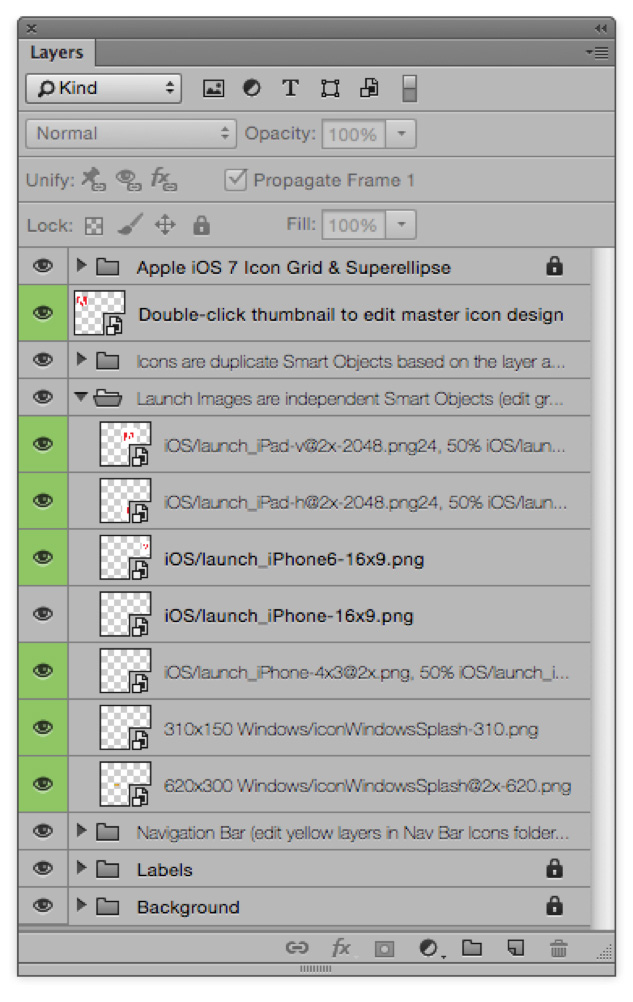
The DPS Asset Generator file uses Photoshop Smart Objects extensively. All the icons are duplicates of a single Smart Object. So, if you edit one icon, all the other icons will be automatically updated. Separate, independent Smart Objects are used for most of the Launch Images.
- To edit a Smart Object, double-click the layer thumbnail. It opens as another, temporary Photoshop file. It may have layers or additional Smart Objects inside.
- Make your edits, and then save and close the Smart Object file. When you return to the main Photoshop file, all duplicate Smart Objects update automatically.
A Smart Object may have layers and it may also contain additional Smart Objects or vector Smart Objects.
- Double-click the thumbnail for any Smart Object to edit its contents. Vector Smart Objects are edited in Adobe Illustrator when opened. After editing a vector Smart Object in Illustrator, save and close the file in Illustrator and then return to Photoshop to see the content update automatically.
- Save and close all Smart Objects until you return to the DPS Asset Generator files, all duplicates of the Smart Object will be updated.
What you should edit
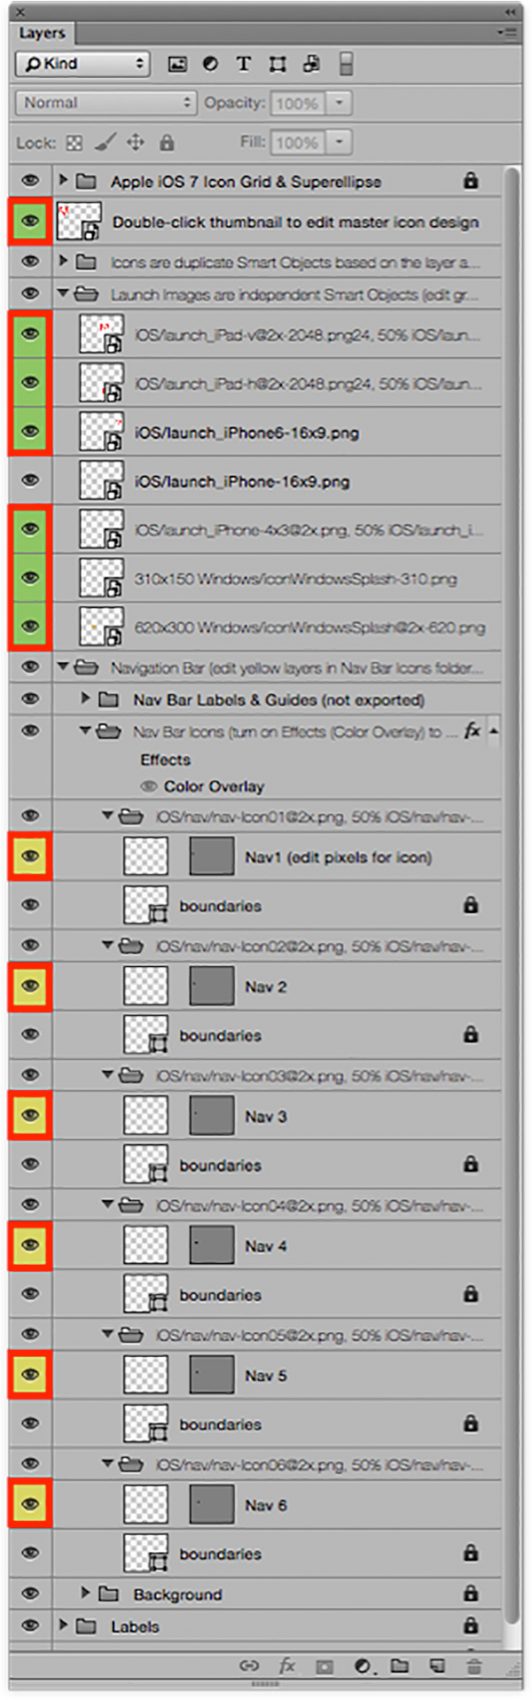
Layers with a green label are Smart Objects that you should customize. You will find green layers in the Layers panel and in the Launch Images folder in the Layers panel. When you edit content, the assets will be re-generated.
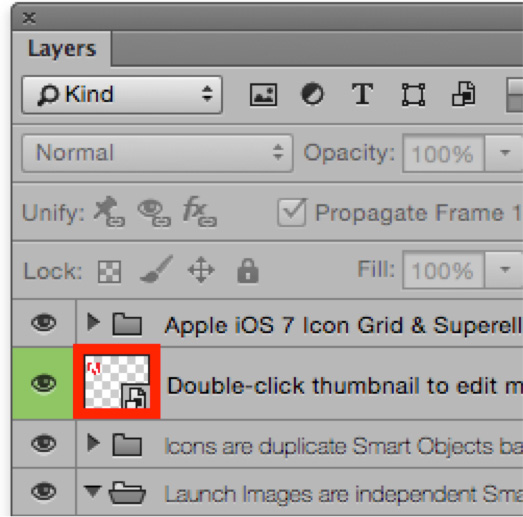
- Double-click on the thumbnail for the layer named “Double-click to edit master icon design” in the layers panel.
- Edit each of the Launch Image Smart Objects with the green label. Most of the Launch Images are independent Smart Objects because each size and orientation of the launch images will likely have different designs. The two 16:9 iPhone images are duplicate Smart Objects, so when you edit one the other will update automatically.
- When you edit the Smart Objects, keep your design within the confines of the artwork to avoid changing the pixel dimensions.
- Check the dimensions of your assets after they’re generated.
- The two Windows Launch Screens support transparency. The Smart Objects used for these two assets include a layer called “pixel defender” — this layer has four pixels with very low opacity, which occupy the outermost corners of the Smart Object and defend the dimension of the asset. You can include transparency in other layers of these Smart Objects.
- The Nav Bar Icon layers with the yellow label are not Smart Objects, but they should be modified if you intend to customize the navigation bar by adding “custom slots” for an iOS app. Edit the pixels using black and white, only the black pixels inside the vector masks are included in these icons. Toggle the Color Overlay above the Nav Bar Icons to preview these icons showing the blue highlight color used by iOS.
Using the files with DPS App Builder
When you are in the Icons and Splash Screens pane of DPS App Builder for iOS, you can manually load each asset by clicking the folder icon for each asset. Or you can drag and drop all the icons and splash screens from MacOS X to the DPS App Builder; select all files in the iOS folder except the nav folder and its contents, then drag and drop them onto the Icons and Splash Screens pane. DPS App Builder will load the assets into the appropriate entry field based on the asset dimension. Repeat this drag-and-drop process for the HD iPad. If your app is also for iPhone, repeat this process to load SD and HD assets for iPhone.
If you’re building Android or Windows applications, use the generated assets in the corresponding folder when you build or submit the app. And if you’re using Xcode, you may choose to rename the generated files.
href="http://www.adobe.com/devnet/digitalpublishingsuite/articles/working-with-dps-asset-generator.html" data-color-override="false" data-hover-color-override="false" data-hover-text-color-override="#fff">Button Text href="http://download.macromedia.com/pub/developer/dps/DPS_Asset_Generator.psd" data-color-override="false" data-hover-color-override="false" data-hover-text-color-override="#fff">Button Text